Saturday, July 28, 2012

PICTURE AND NECKLACES

I know you are probably tired of reading how hot it is, but today was very warm and tomorrow it's suppose to get up to 105! It's my great niece's birthday party and I don't think I can get out in this hot, hot weather. Will make that decision for sure tomorrow.

I have been busy making some necklaces and working on a picture of Neela. Let me share that first:


I found a free printable on the Internet and made several copies of it. The song title is Smile and Show Your Dimple. It is part of a church Easter program. I don't know how old the song is, I know it was just what I needed.                                   

I found the picture I took of her with a big smile and her dimples showing and after much copying, cutting, I finally got the black and white photo just the way I wanted it. Only part of the song is here but it has the part about her smile and her dimple.

Then I just put it in an 8x10 picture frame. I had to cut the picture down from an 8 1/2 x 11 so that is one reason I had to copy so many pictures.

I am so pleased with the way it turned out. The frame is a beautiful gold and I am thinking about putting some red dots on the frame, since her feather bow is red. Just a thought!


Now for the jewelry fun. I see people designing lots of necklaces with all kinds of things attached to them, whether it be beads, broken pins, etc. I don't usually do this because I like simpler things. Well, I stepped outside my comfort zone again and here is what I made.


I must stop and apologize for how awful my pictures are lined up each time. I just can't seem to get the computer to do what my what I want done. Must be me because other people don't have this problem.
Top and bottom left: Just a simple beaded necklace that I had and I added a broken bracelet piece in the center, then I had vintage crystal beads that I linked for dangles. The flower piece is from a pair of earrings that I found. So simple but I think it makes a statement.

Top Center: I made the necklace from a piece of vintage chain that was my mom's. The hang down is an earring. On the left, is a diamond shaped pendant that is 925 sterling silver with what looks like a black onyx stone. Under that is a vintage earring from the 60's. Now the piece on the right side of the necklace is most unusual. I don't remember where I got it. It's a piece of broken jewelry. The little piece dangling down is black chain and rhinestones. I used 3 black jump rings to hold it to the necklace. I wanted it to have freedom to move around.

Top Right: I had some green chain, green toggle closure, 2 pieces of beads that were hooked by loops, (They were broken off of some necklaces), a gold buckle off a shoe and a beautiful dragon fly pendant piece. The buckle had 5 holes on top and the same on bottom, so I just used jump rings to attach the dragon fly to the bottom of the buckle. The two beaded pieces were different lengths but that didn't matter. I connected them into the first and last holes of the buckle. Before I connected my green chain, I looked around and found 2 pieces of what was a plastic candy ornament. One is pink and the other is blue. I made loops in them. Then I found 2 unusual glass beads to finish the look and made loops in them (with head pins). On one side, I connected the bead, then the candy piece and on the other side, I put the candy piece, then the bead. Finished it all off with the green chain.

Well, that's it for this time. Keep checking back with me. I am working on some more projects to share with you. As always, be safe! Jan


Saturday, July 7, 2012

Newest Bracelet

Good morning! Hope everyone is doing great on this Saturday morning. It's warming up outside, but my plans are to stay inside all day and get housework and laundry done.

I found a bracelet pattern that I loved and so I pinned it to my Pinterest board (crafts - jewelry). If you aren't familiar with Pinterest, go on www.pinterest.com and check them out. You can check out lots of boards. I am JG Hickman on there. A board is what you call your 'bulletin board'. It is things you like, vacations you want to take, whatever best fits you. When you post those things, they are opened up and you will get followers who are interested in things you are interested in. They can choose to follow you and all your boards or just you and one or two boards. When you are searching the web or pinterest pages, you can 'pin' what you like and send it to your board.

I use to make copies of everything, now I can just go to my board and pull up what I want. My family follows me and now I have about 10 people who are following me. Some people have 200 or more following their boards. It's free, so check it out.

Now let's get to the bracelet. Photos please:


Top left:  I cut a piece of chain that was long enough to cover the back of my wrist. Then I cut the chain in half and added a barrel closure. To the chain, on each end I added an 'outie' portion of the closure.

Top right: I took some bracelet wire and strung enough beads on it to cover the top part of my wrist. I added and 'innie' portion of the barrel clasp to each side. Now the bracelet just hooks together on each side and you're done.
Bottom left: Then I took beads and looped them together to make another bracelet 'top'.
Bottom right: See where this is going? I looped different beads together and made the third bracelet top.

I must prewarn you - this will become a habit instantly! You could make a bracelet for a friend and give it to them along with 7 tops (one for each day of the week).

Special note: It is easy to make the bracelet too big. I forgot to include the length of the barrel closures and had to cut part of the chain.

Have fun and share your pictures with me. Want to see what you have done!!!


Thursday, July 5, 2012

Cuff Bracelet and Flower Pot

Hi everyone. I just came in and it was 102 on our covered back porch. I can't stress this enough - please be careful when you are outside.

I did get some housework done this morning then I worked on two projects and will share those with you. The first is my latest cuff bracelet. It is still in the drying stage, so won't know if it needs more things added to it until it is dry and I can put it on.

This is my first time to use lace on a cuff bracelet. I found this at Hobby Lobby and it was perfect for trying out my latest idea. I used glue that bonds rhinestones and metal to fabric. It takes longer to dry. We'll see how it turns out.

The double heart in the center is an old pin that was broken. On the left is an old earring and the same with the pearls on the right side. I glued just the base down so the pearls can move around when you are wearing the bracelet. The tiny gold flower between the hearts and the pearls is a 12K gold piece from an earring. Then I added a heart with a butterfly on it. Then came some rhinestones, old buttons and a couple of ribbon flowers. This bracelet will have 3 buttons lined up that you can fasten with. I decided to do this since not all wrists are created equal. My friend, Cindy, helped me think this through and I thank her for that.

Cindy and I are known as the picker cousins on Facebook. If you get a chance, go in and see the ideas that we have on taking junk and turning it into something great! Don't forget to 'like' us. I am a Junk Gypsy fan. Cindy and I like to junk with her daughter (and my best friend), Jessica. We have a ball and come up with some pretty neat things. It's fun to look at something and the three of us see the item turned into different things.

I wanted something cute to sit in my office and keep my bracelets in, after they were completed, but not packed away. So, I got busy and turned an old dirty flower pot into a bracelet hideaway.

You will need a flower pot, a foam brush, a disposable cup, some pretty tissue paper and either Mod Podge or Liquid Laminate. I am a big fan of the liquid laminate. I get it at Hobby Lobby and you use to be able to order it from beacon.com.

Start by putting laminate in the cup. Now tear big pieces of the tissue paper.

I keep straight edges along the top. Use your brush and apply the laminate, put your tissue down and brush laminate over the top. Get the  laminate on your fingers and start working the wrinkles either out or work more in. This is the fun part. Continue doing this until the outside of the pot is covered. I don't put tissue on the bottom of the pot.

While the laminate is drying (and it doesn't take long) cut a circle to go down in the pot if you arent' doing to use it for flowers. Then I just glue the tissue on with a glue stick, cut out a bigger circle than the cardboard, clip all around the tissue, turn it over and glue stick it to the back. I do not glue the circle to the flower pot bottom. I might decide to plant a flower next year.


After I started looking at the inside of the pot, I decided some Martha Stewart gold acrylic paint was what it needed. I washed the foam brush and put paint in my cup and just painted the inside. No worrying about seeing the lines or anything because, I took a slightly damp paper towel, waded it up, and dabbed all over the inside to give the paint a different look.


Don't know if you can see the gold paint on my tissue. I just pounced some on and blotted it with my paper towel. Just here and there to give it a antique look. And below is the finished product.


What do you think? If you want to, you can buy wooden balls that are flat on the top. You will need 4. Cover them with tissue or paint them gold and hot glue to the bottom. Now, that you've gone that far, get the base that this pot would sit in, paint it or tissue it (get the ball feet and top to match), and add another knob to the base (turn it upside down) and you have a lid for your pot.

I have made these and filled them with bags of hot chocolate mix and put a cup in a bag and given as a gift. I can see the wheels turning.

I am glad you are reading my blog and I will be back in a few days with more things for you to make. Until next time - Jan


Tuesday, July 3, 2012

Thunder and Crafts

Wow! We got thunder today. It didn't rain where we live, but about 20 miles away, they got a shower. I turned the TV off just so I could listen to the thunder. Haven't heard it in quite some time.

Then, tonight I go outside and I see a beautiful full moon. My husband tells me it has been full for several nights. Ok, I don't get out at night. I don't like the dark!

My great grand daughter will be '1' this Sunday. Just seems like yesterday when she was born. My grandson's finance' also has a birthday Sunday. July is a busy month at our place for birthdays!

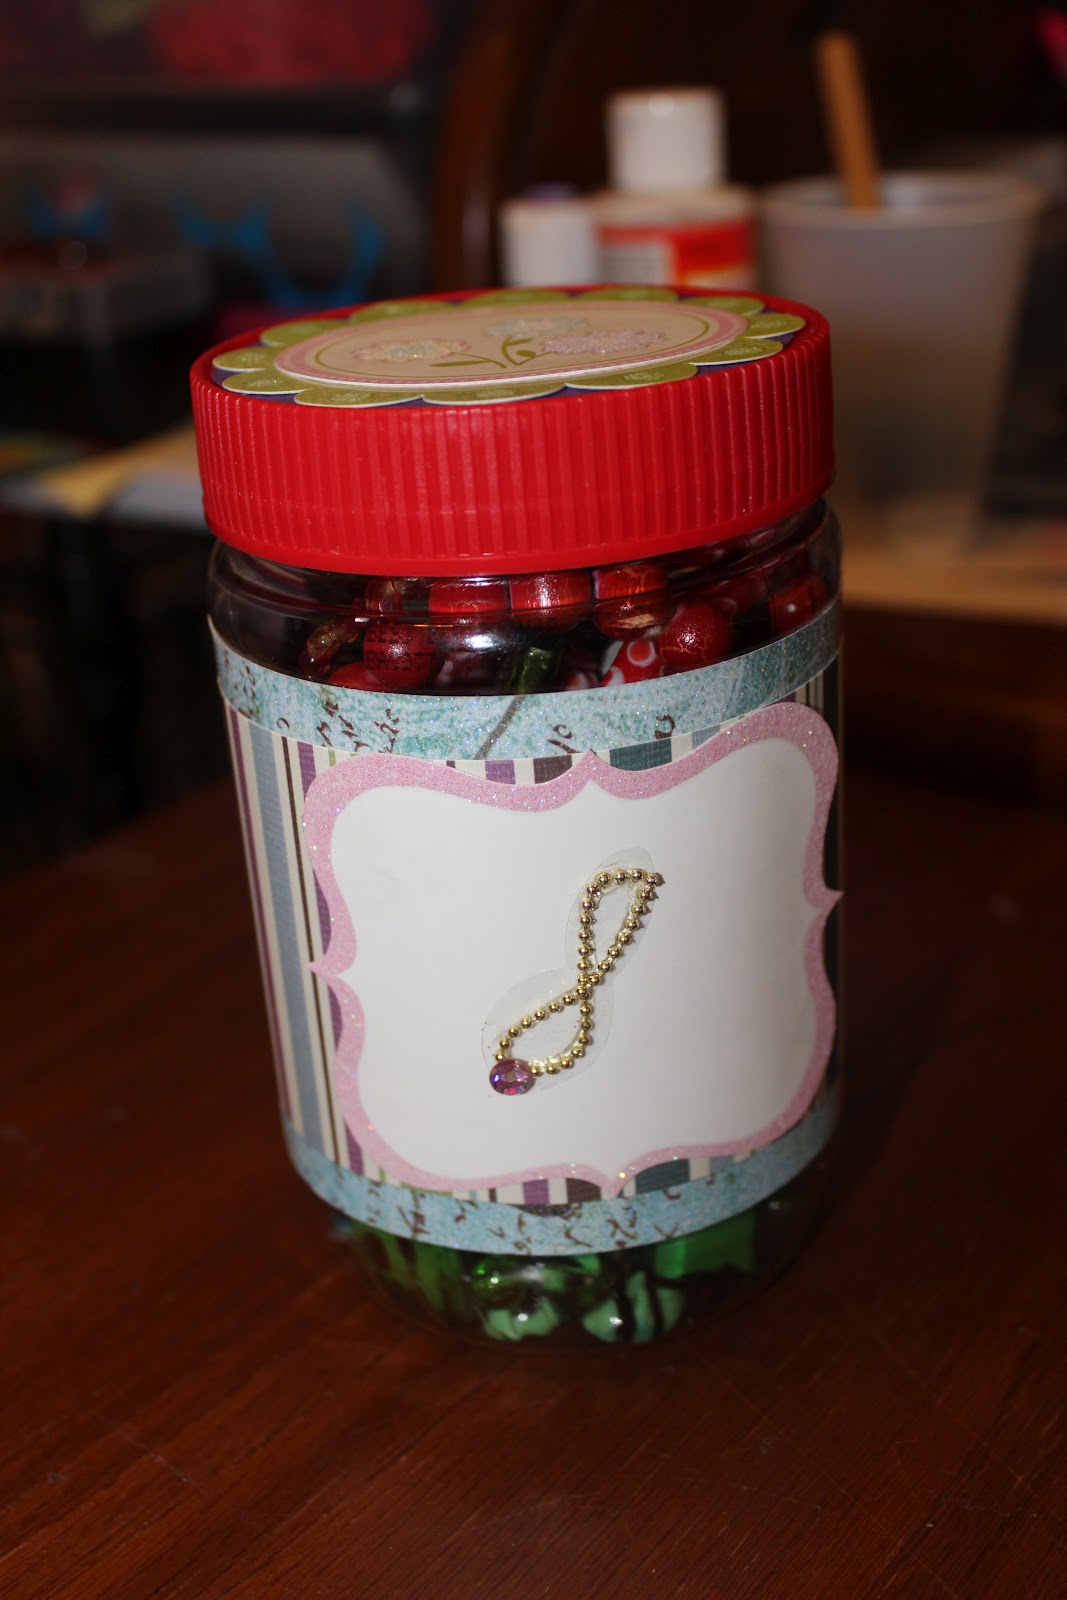
I have had a productive craft/jewelry making day. Let's start off with a recycled peanut butter jar. When I worked at Walmart, we had peanut butter and bread in our break room and we saved the jars and recycled. One year we filled 200 jars with craft kits (that we created) and took them to our local youth center for them to hand out to the kids. Once, we filled jars with items for one of our nursing homes.

I needed something to put the jewelry strands in that I planned to work on next. I had this jar in the kitchen, so I cleaned it up and decorated it.

I just cut scrapbook paper with 2 different patterns and glued them around the jar. I used a purple piece of cardstock and traced around the jar lid and cut the paper to fit. After I glued that on, I found a die cut flower, so I finished lid with this decoration.
Then I glued on a paper label. I didn't want to write on it since I might use this jar for other things. I went through my scrapbook supplies and found a necklace sticker. Perfect. As you can see, it didn't take me long to fill the jar.


The bracelet above is made with glass beads. As you can tell, some beads have black stripes and some have black polka dots. I used a large gold toggle and small black beads as spacers.

     
Several years ago I was shopping the clearance at Hobby Lobby and found this patch. It was just the
the patch. I found it while looking for something else and got some chain together and an old earring and made a necklace.
Punched tiny holes in the patch and added the two pieces of chain to the bottom. Then I added a long piece of chain to the top of the patch. The chain wasn't the same style or color but I thought it looked good. To top if off, I added an old dangle earring to the bottom. It hangs in front of the two bottom chains. Now, to figure out what I am going to wear it with. Or, who to give it to as a gift. Decisions! Decisions!


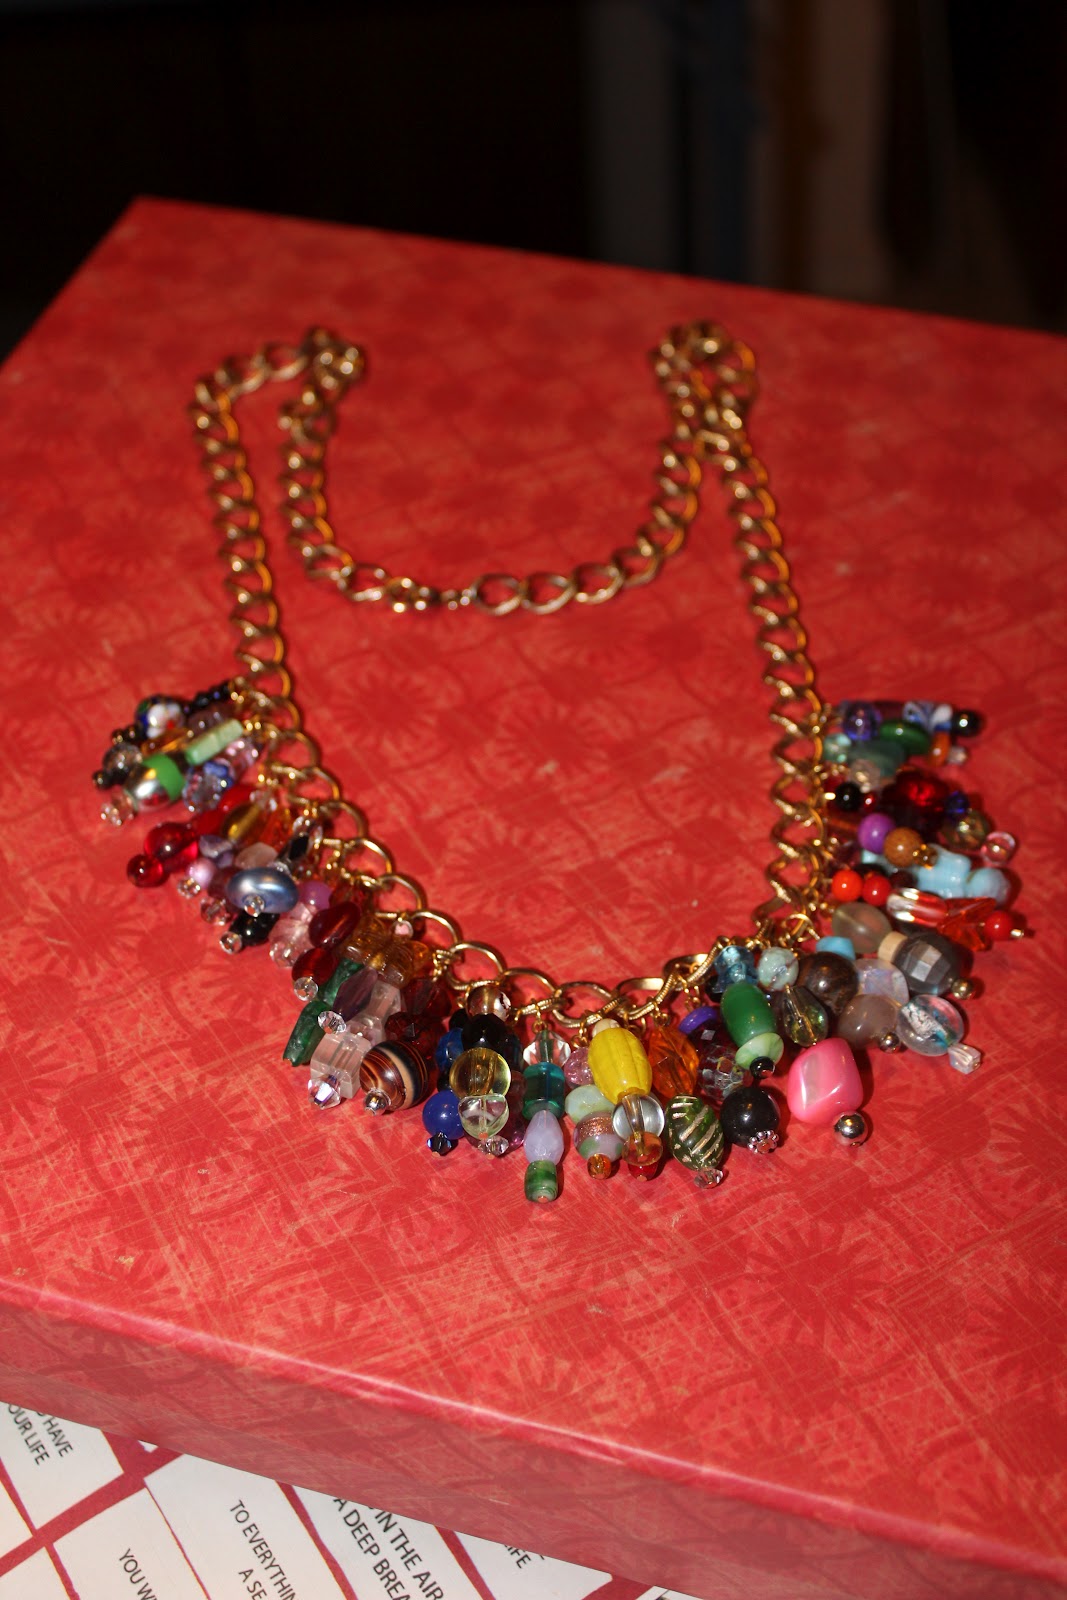
My latest necklace. I have been so wrapped up in the charm bracelets I am making that I decided to put together a necklace using beads that are left from other projects. They are various styles, colors, lengths, etc. The chain is currently 30", but I plan to cut it down to 26" or what length do you think it should be? Let me know what about this project.

How to make it: Get head pins, asst. beads, jewelry wire cutter, round nose plier and regular jewelry plier. Also, jump rings in your choice of size.

I just started loading the beads on the head pin and when I got the length I liked, cut it, made a loop, attached it with a jump ring to the necklace chain. I put two of these in each length. I didn't want to go all around the chain. I made this so you can wear it under your collar and the chains will show underneath. Or, just put it over a tee and have fun!

Hope you enjoyed these projects today. Please leave your questions, ideas, comments in the box below. Have a great evening and a fun tomorrow. Until next time - Jan

Sunday, June 10, 2012

EARRING HOLDER & NEW JEWELRY

Yesterday I went to town to run a few errands. As I was checking out at Dollar General, I saw these canvas paintings on clearance. This one was marked $3.00, so I bought it. It has amber rhinestone bling in the center of each flower, I got a black marker and wrote dream, live, laugh & love on the lighter colored side. I poked holes in the canvas where I could add earrings. You can't see the holes, so if I get tired of it as an earring holder, I can still enjoy it. I plan to darken in my words and add a couple more flowers to it. I am pleased with the way it turned out. I guess this is an up cycle - finding a new use for a product.
One of a kind - Green and gold glass bead bracelet. The toggle is silver and the small beads are also green and gold. I bought these beads two years ago at Hobby Lobby and am just now deciding what to do with them. It's a good thing that most beads last forever.


Memory wire bracelet with some different colors that most people wouldn't put together. It starts out with a blue, purple & gold swirled bead. Next, comes the square beads that are turned on their side to look like a diamond. They are a greenish amber color. Next, comes the 4mm purple beads and in the middle of that are 5 crystal beads, then more of the 4mm purple beads. Then the round purple beads in different shades. Finished off with  lighter purple beads and in the middle, two floral metal beads.
 This bracelet is on it's way to Camp Siloam, Siloam Springs, AR. It is made with leather cording tied on each side. The center is glass. I don't make very many of these. The glass is just too expensive to make them affordable.


Sorry about this poor photo. No, it's not another bracelet. This is a 20" necklace with a silver toggle closure. The beads are both glass and wooden. I plan to tie off a few pieces of ribbon to 'jazz' it up. Cindy and I saw one of these at the Branson Landing and I decided to work on my own design.
Well, that's about all I have gotten accomplished in two days. I am trying to figure out how I can get my jewelry supplies together in the closet in the spare bedroom. It is an 8' closet with just scrapbook albums on the top shelf. It needs a good design where I can open both folding doors, sit at a table and have everything right there. My office just isn't big enough for the jewelry to take up so much space. Got any ideas??? Let me know. I can sure use the help. I need to hire someone to sort out all my small beads. That would help a lot. Until next time - stay crafty! - Jan

Wednesday, May 30, 2012

Newest Jewelry Sets

Still under the weather but managed to get a few things accomplished. The top photo is from a necklace of my mom's that was broken and I have saved the pieces for 12 years. I finally got the beads out and made an 18" necklace, bracelet and drop earrings. Sets are not what I usually do, but I like the way these turned out. The beads are white with a shine on them that are really unique. The bracelet is a wrap and I fixed it with a closure, so you wear it like a regular bracelet. This is the first one I have made like this and I think more are in the future. Just stepping outside that box I always talk about.
This bottom photo is another set. The beads are more like pearls and are deep amber with black beads that have a dark gold marking. It is also an 18" necklace. Each of these necklaces have a 2" chain that will allow the necklace to be 20". The bracelet is a two wrap memory wire with an amber bead on each end. The earrings have 4 beads on them.

Hope everyone had a fantastic Memorial Day weekend. Next holiday is Fathers' Day. Then comes Labor Day and 3 days off. This is short, but wanted to get these photos to you. Thanks for reading my blogs and feel free to leave comments.
See you on Facebook! - Jan

Saturday, May 26, 2012

Bracelets, necklace, bracelets, Oh My!

Saturday is here! Got to go to Branson, MO yesterday with my dear friends, Jessica & Cindy. We went to a Farm Girls sale and it was exciting. We all bought a few things. Cindy bought some bar stools that are really neat! Of course, we just had way too much fun!

I have been busy with my granddaughter, Krystan, and of course, working on some jewelry projects. Let me share a couple of pictures with you.
This is a six strand memory wire bracelet. It's made from beads that I had forgotten I had. Am I the only one with this problem?? I don't usually put two rows of the same beads, but I just wanted something that really would be out of the box for me. These are all glass beads. I love the combination of square beads with round beads and ending with a rough cut bead. This looks great on Krystan, so she will be wearing it to school in August.
Light green/medium green beads with a very light green heart shaped bead. Will finish the ends off with a heart shaped bead for a charm effect. These are either an 8mm or 10mm bead.. They are larger than what I normally use on my bracelets.


Swirled color glass beads with crystal beads. They shimmer and throw off different colors as you move your arm. Ended with a blue dangle. Krystan picked out the beads for this. I got them on sale at our local Sugar Gems (they are on Facebook) in Harrison, AR. I have $9.00 invested in a bracelet that would sell anywhere from $20 to $45, depending on the location. Krystan got to try it on for the first time last night. This will be another school bracelet. Makes me feel good when a teenager likes my work.

A simple, but feminine pink ribbon necklace with a dragon fly. The dragon fly is a popular item to have on any piece of jewelry. I don't know if it is to symbol good luck or because of the movie, it is still very popular. My daughter in law has a small dragon fly tattoo on top of her foot and it's really cute. You only see it in the summer time when she wears a flip flop type sandal.
Found these braided pony bands (10 for $1.00) at our Dollar General. I put a charm in the middle of a couple of them and I have bracelets. Krystan thought they were pretty neat. Guess, if you needed to put your hair in a pony tail, just take off your bracelet and it's done. I find it amazing when you take an item and use it for something else. It's like recycling! Only these are new items.
Well, as I close for this time, I want to wish you a Happy Memorial Day weekend. Two more days off. If you get a chance, thank a vet for serving for our country. Just take a few days out of your day to be thankful. Drive careful! Until next time - Nana Jan